


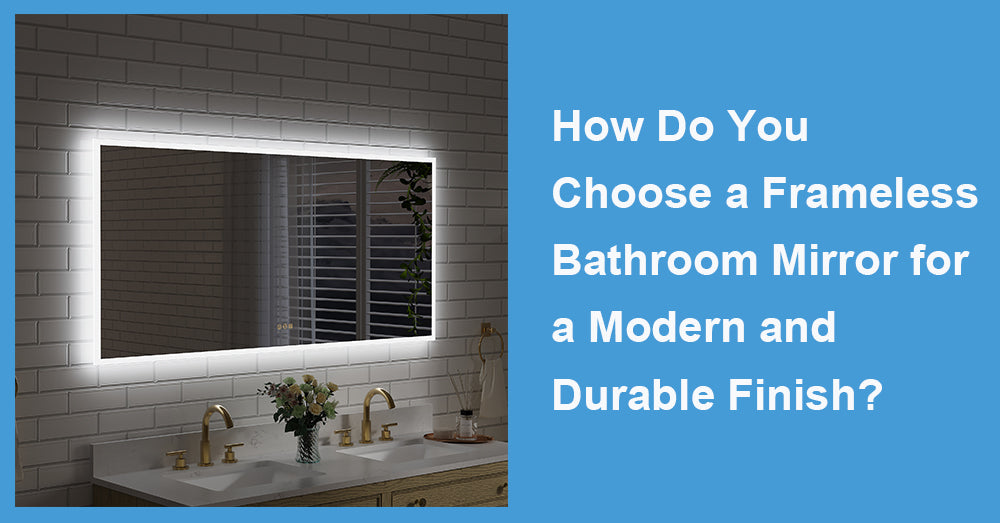
A frameless bathroom mirror can make a bathroom feel cleaner, brighter, and more architectural—without adding visual clutter. But “frameless” also means the mirror’s glass quality, edgework, mounting method, and moisture protection are doing all the work that a frame would normally hide. If you want a mirror that stays crisp for years (not one that develops black edge spots, loosens, or looks wavy), you’ll want to choose based on measurable specs and proven installation practices—not just size and style.
1. Start With Size and Placement (Because Comfort Is the First “Luxury”)
A frameless mirror looks modern when it’s proportioned to the vanity and mounted at a comfortable viewing height. A practical reference point comes from widely used accessibility guidance:
· Mirrors above a lavatory/countertop: bottom edge of the reflecting surface 40" max above the finished floor.
· Mirrors not above a lavatory/countertop: bottom edge of the reflecting surface 35" max. (Source: 2010 ADA Standards, Section 603.3)
Even if you’re not designing for accessibility, these numbers are excellent “reality checks” that prevent a mirror from creeping too high. In real bathrooms, the most common mistake is mounting the mirror based on wall symmetry instead of daily ergonomics.
Practical placement tip: Stand at the sink, mark your eye level, and aim for your eyes to land in the upper-middle of the mirror—not near the bottom edge.
2. Choose the Right Thickness for a Solid, Premium Look
Frameless mirrors can be made in multiple thicknesses. Thicker glass generally feels more substantial and is less prone to looking “cheap” or vibrating if the wall isn’t perfectly flat.
One reason thickness matters is weight (which affects mounting requirements). A glass weight chart lists these typical weights:
· 1/4" glass ≈ 3.27 lb/sq ft
· 3/16" glass ≈ 2.45 lb/sq ft (Source: “Glass Weight per Square Foot” PDF)
How to use this:
If your mirror is 30" × 40", that’s 8.33 sq ft.
· At 1/4", weight is roughly 8.33 × 3.27 ≈ 27 lb (before packaging and hardware). (Source: weight chart)
That’s not “heavy glass door” territory, but it’s heavy enough that shortcuts in adhesive choice, wall prep, or clips can cause long-term issues.
Reliable everyday recommendation: For most bathroom vanity mirrors, 3/16" to 1/4" is a practical range. If you want a more premium feel and cleaner reflections, 1/4" is often a safe default—just ensure the installation method is appropriate for the weight.
3. Don’t Treat Edgework as a Cosmetic Detail—It’s a Durability Feature
A frameless mirror’s edges are exposed to humidity and cleaning. Poor edge finishing can chip more easily and can accelerate moisture intrusion that leads to edge deterioration (“desilvering” or black spots).
Look for edge options such as:
· Polished edge: sleek, modern, and easier to wipe clean
· Seamed edge: slightly less refined but still functional
· Beveled edge: decorative; can still look modern if subtle
If long-term durability is your priority, prioritize clean edge finishing and avoid repeatedly soaking the bottom edge during cleaning.
4. Humidity Control Is Non-Negotiable (It Directly Impacts Mirror Life)
Bathrooms regularly spike in humidity, and mirrors suffer when moisture lingers at edges and behind backing paint.
EPA guidance on humidity control recommends keeping indoor relative humidity below 60%, ideally between 30% and 50%. (Source: EPA Mold Course / IAQ moisture control guidance)
What this means for your mirror:
· Even a great mirror can deteriorate faster in a bathroom that stays damp.
· Better ventilation reduces condensation and lowers the risk of edge corrosion.
Simple habits that protect a frameless mirror:
· Run the exhaust fan during showers and for a period after.
· Avoid storing dripping towels directly under the mirror.
· Wipe down standing water around the sink backsplash and mirror bottom edge.
5. Installation Quality Determines Whether “Frameless” Stays Elegant
This is where most failures happen. A frameless mirror depends on proper adhesive compatibility and correct spacing so the mirror doesn’t sit in constant contact with hard surfaces.
A GANA installation guidance document recommends:
· Using a 3 mm neoprene setting pad between the mirror and clips/molding.
· Using neutral-cure adhesives.
· Avoiding adhesives containing strong solvents or acids (including acetic acid) because they can severely damage mirror backings. (Source: GANA mirror installation techniques PDF)
Why neutral-cure matters: Acid-cure silicones can attack mirror backing systems over time. If you’re using adhesive (or any perimeter sealing), neutral-cure is the safer specification. (Source: GANA mirror installation PDF)
Two common mounting approaches (and what to demand)
1. Mechanical support (clips, J-channel, or brackets) + adhesive assist
o More forgiving long-term
o Easier to service
o Reduces reliance on adhesive alone
2. Adhesive-only mounting
o Can look ultra-clean
o Requires correct adhesive chemistry and wall prep
o Riskier if the wall is uneven or the wrong sealant is used
If your goal is “durable elegance,” the best practice is usually mechanical support + compatible neutral-cure adhesive, installed with correct pads and spacing. (Source: GANA mirror installation PDF)
6. Know the Early Warning Signs of Mirror Deterioration
Edge darkening is a common issue in bathrooms, and it’s often misunderstood. Mirror deterioration typically shows up as dark spots or black “creep” near edges; the damage is beneath the surface, not something you can wipe off. (Source: MirrorMate article on mirror deterioration/desilvering)
Prevention mindset:
· Choose correct installation materials (neutral-cure, compatible adhesives).
· Reduce prolonged moisture exposure.
· Keep edges clean and avoid harsh chemicals that sit on the bottom edge.
7. A Copy-Friendly Buying Checklist
Use this checklist when comparing frameless mirrors:
Reflection quality
· Looks flat and undistorted at normal viewing distance (no “funhouse” warping).
Thickness and weight planning
· Prefer 3/16"–1/4" for a sturdier feel.
· Remember 1/4" glass is about 3.27 lb/sq ft (Source: glass weight chart)
Edge finish
· Polished or cleanly seamed edges; corners finished neatly to reduce chipping risk.
Moisture resilience
· Bathroom humidity ideally stays 30%–50%, and should be kept below 60% (Source: EPA)
Installation specification
· Installer uses neutral-cure adhesive/sealant compatible with mirror backing.
· Mirror is set on proper pads/spacers; avoids hard contact points. (Source: GANA mirror installation PDF)
Placement sanity check
· If above a sink/counter, consider the 40" bottom-of-reflective-surface reference for comfortable usability (Source: ADA 603.3)

Conclusion
A frameless bathroom mirror looks modern because it disappears into the architecture—but that also means it must be engineered and installed correctly to stay beautiful. Choose a thickness that feels solid, insist on clean edgework, keep bathroom humidity under control, and—most importantly—spec the right installation materials. If your installer follows guidance like neutral-cure adhesives and proper setting pads, you dramatically reduce the risk of edge deterioration and keep that crisp frameless look for the long run.


Leave a comment
This site is protected by hCaptcha and the hCaptcha Privacy Policy and Terms of Service apply.