


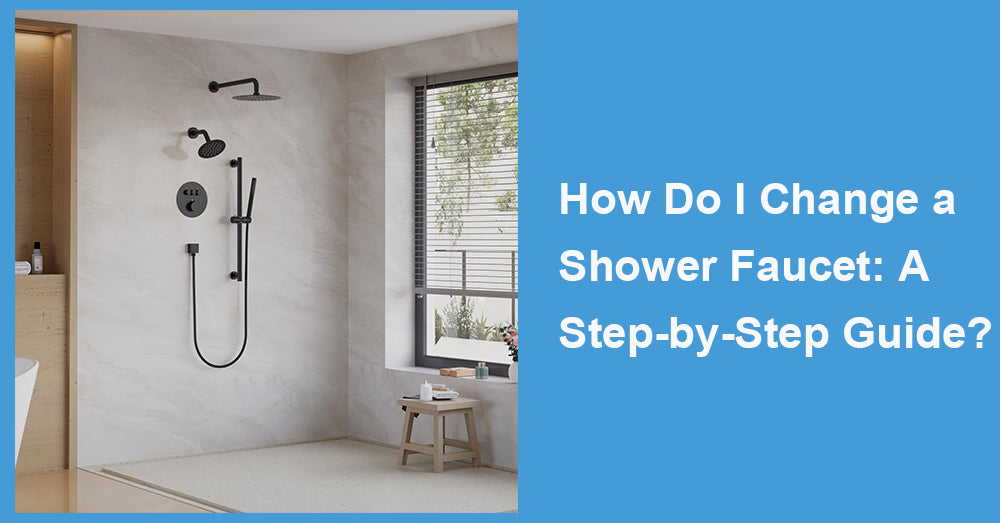
Suppose you are wondering how to change a shower faucet: the visible handle and trim are not always the same as the valve hidden inside the wall. That difference matters because bathroom remodeling remains a major home upgrade category. The 2025 Houzz renovation study reports a median spend of $13,000 for primary bathroom remodels, and bathroom faucets are among the most frequently updated features, appearing in 86% of bathroom renovation projects. In practical terms, replacing a shower faucet is common, but the right approach depends on whether you are changing only the trim or replacing the valve.
1. Identify What Needs to Be Replaced
When assessing a purchase, consider whether it is cosmetic, mechanical, or both. In most showers, you can replace the handle, escutcheon plate, and decorative trim without removing the valve body. If your valve is in good shape and the new trim fits it, this may be the easiest option. If your valve is leaking behind the wall, the cartridge has failed repeatedly, or your new trim will not work with your original rough-in, you may need to replace the valve rather than do a surface upgrade. Many times, at this point in the project, that is where it goes awry. A new finish may look nice in an online picture or advertisement, but it is not interchangeable with shower trim. The key to achieving a good result is first to identify the original shower system, then find compatible replacement parts for that system rather than forcing an incompatible shower trim kit onto an old valve installation.
2. Understand Why the Valve Matters
Modern shower systems are not only about style. Plumbing codes and industry standards require shower and tub-shower combinations to use pressure-balance, thermostatic, or combination mixing valves to help reduce scalding and thermal shock. Those standards also require handle position stops to be adjusted according to manufacturer instructions, so the maximum mixed water setting is 120°F. That means replacing an outdated valve is sometimes the safer decision, not just the prettier one.
A full valve change becomes even more important when you plan to install a newer, low-flow showerhead. The International Plumbing Code emphasizes that shower control valves should be rated for the installed showerhead, as the showerhead's flow rate affects how the system responds to pressure and temperature changes. In short, the showerhead and mixing valve should work as one coordinated system.
3. Shut Off the Water and Remove the Existing Trim
Once you know what you are replacing, start by shutting off the water supply. Then protect the drain opening so screws or clips do not fall inside. Remove the handle, trim plate, and decorative sleeve carefully. If the trim plate has been caulked to tile, cut the seal before pulling it loose. Rushing here can crack tile, damage the wall opening, or bend reusable parts.
As you disassemble the faucet, take clear photos of each stage. Record screw placement, handle orientation, cartridge position, and any model markings. This saves time later, especially if you need to buy replacement parts after opening the system. It also helps you notice hidden issues such as staining, moisture damage, or movement around the valve opening.
4. Inspect the Cartridge and Internal Parts
Once the trim is off, inspect the cartridge and valve body. If the valve body is sound and the issue is limited to dripping, stiffness, or poor temperature control, replacing the cartridge may solve the problem. That is often easier and less invasive than opening the wall to replace the full valve. In many cases, a cartridge refresh restores performance while allowing you to install updated trim in the same finish family.
This step is also a good time to think about efficiency. EPA states that showering accounts for nearly 17% of residential indoor water use, or nearly 40 gallons per day for the average family. Standard showerheads can use up to 2.5 gallons per minute, while WaterSense-labeled models use no more than 2.0 gallons per minute. EPA also estimates that replacing one showerhead with a WaterSense-labeled model can save about 2,700 gallons of water and more than 330 kilowatt-hours of electricity each year.

5. Replace the Valve if Compatibility Is the problem.
If the new trim does not match the existing valve, or if the old valve is outdated, corroded, or unreliable, the wall will need to be opened. The old valve is removed, the new valve is secured between the framing, and the hot, cold, and shower outlet connections are reworked. This is the part of the project where rough-in depth matters. If the valve sits too far back or too far forward, the finished trim may not sit flush or function correctly.
A valve replacement is also where product quality and installation accuracy matter most. The finished shower may look simple, but the real performance comes from what is hidden behind the tile. When the valve is installed correctly and matched to the showerhead, the system is more likely to maintain a stable temperature and smooth operation over time.
6. Reassemble, Test, and Set Safe Temperature Limits
After repairs or replacement are complete, reinstall the trim, handle, and shower components. Turn the water back on slowly and test for leaks before permanently sealing anything. Then check both pressure and temperature. This is not a small finishing detail. Industry guidance calls for handle stops to be adjusted so the maximum mixed water setting remains at 120°F, helping reduce scald risk during daily use.
Also, test the new showerhead under normal operating conditions. Efficient fixtures should still feel comfortable and consistent. A shower upgrade should improve appearance while also delivering reliable flow, safe temperature control, and better overall performance.
7. When DIY Makes Sense
A trim swap or cartridge change is often manageable for a careful DIY homeowner. But once the job involves opening the wall, moving supply lines, soldering connections, or correcting a bad rough-in, professional installation is usually the safer choice. That is especially true in bathrooms, where the shower is now treated as a high-priority feature rather than a basic utility. Houzz data shows that shower upgrades remain a major focus within renovation projects, which explains why performance and finish quality are both getting more attention.
The best answer to how to change a shower faucet is this: identify the system first, decide whether you need trim, cartridge, or valve replacement, and treat the faucet, valve, and showerhead as one complete working assembly. That is how you get a result that looks better, works better, and lasts longer.


Leave a comment
This site is protected by hCaptcha and the hCaptcha Privacy Policy and Terms of Service apply.