


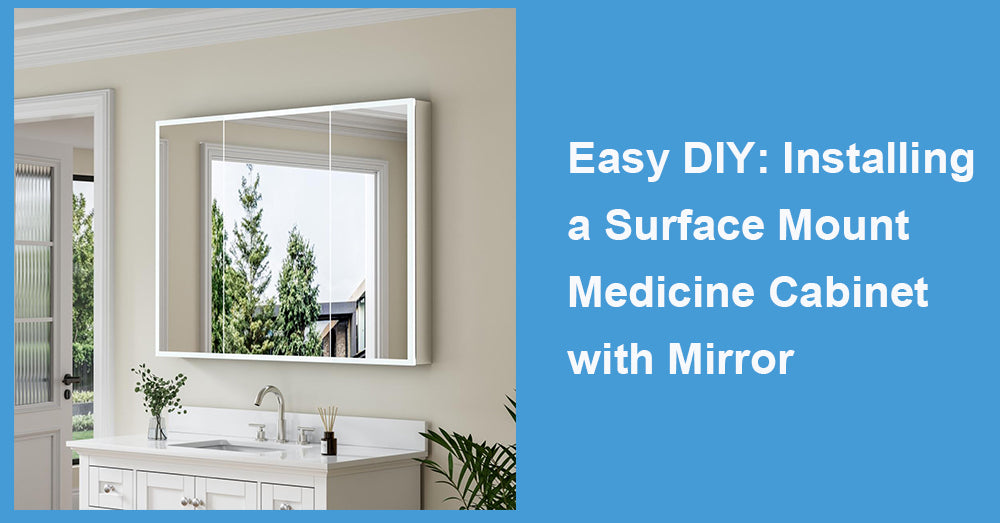
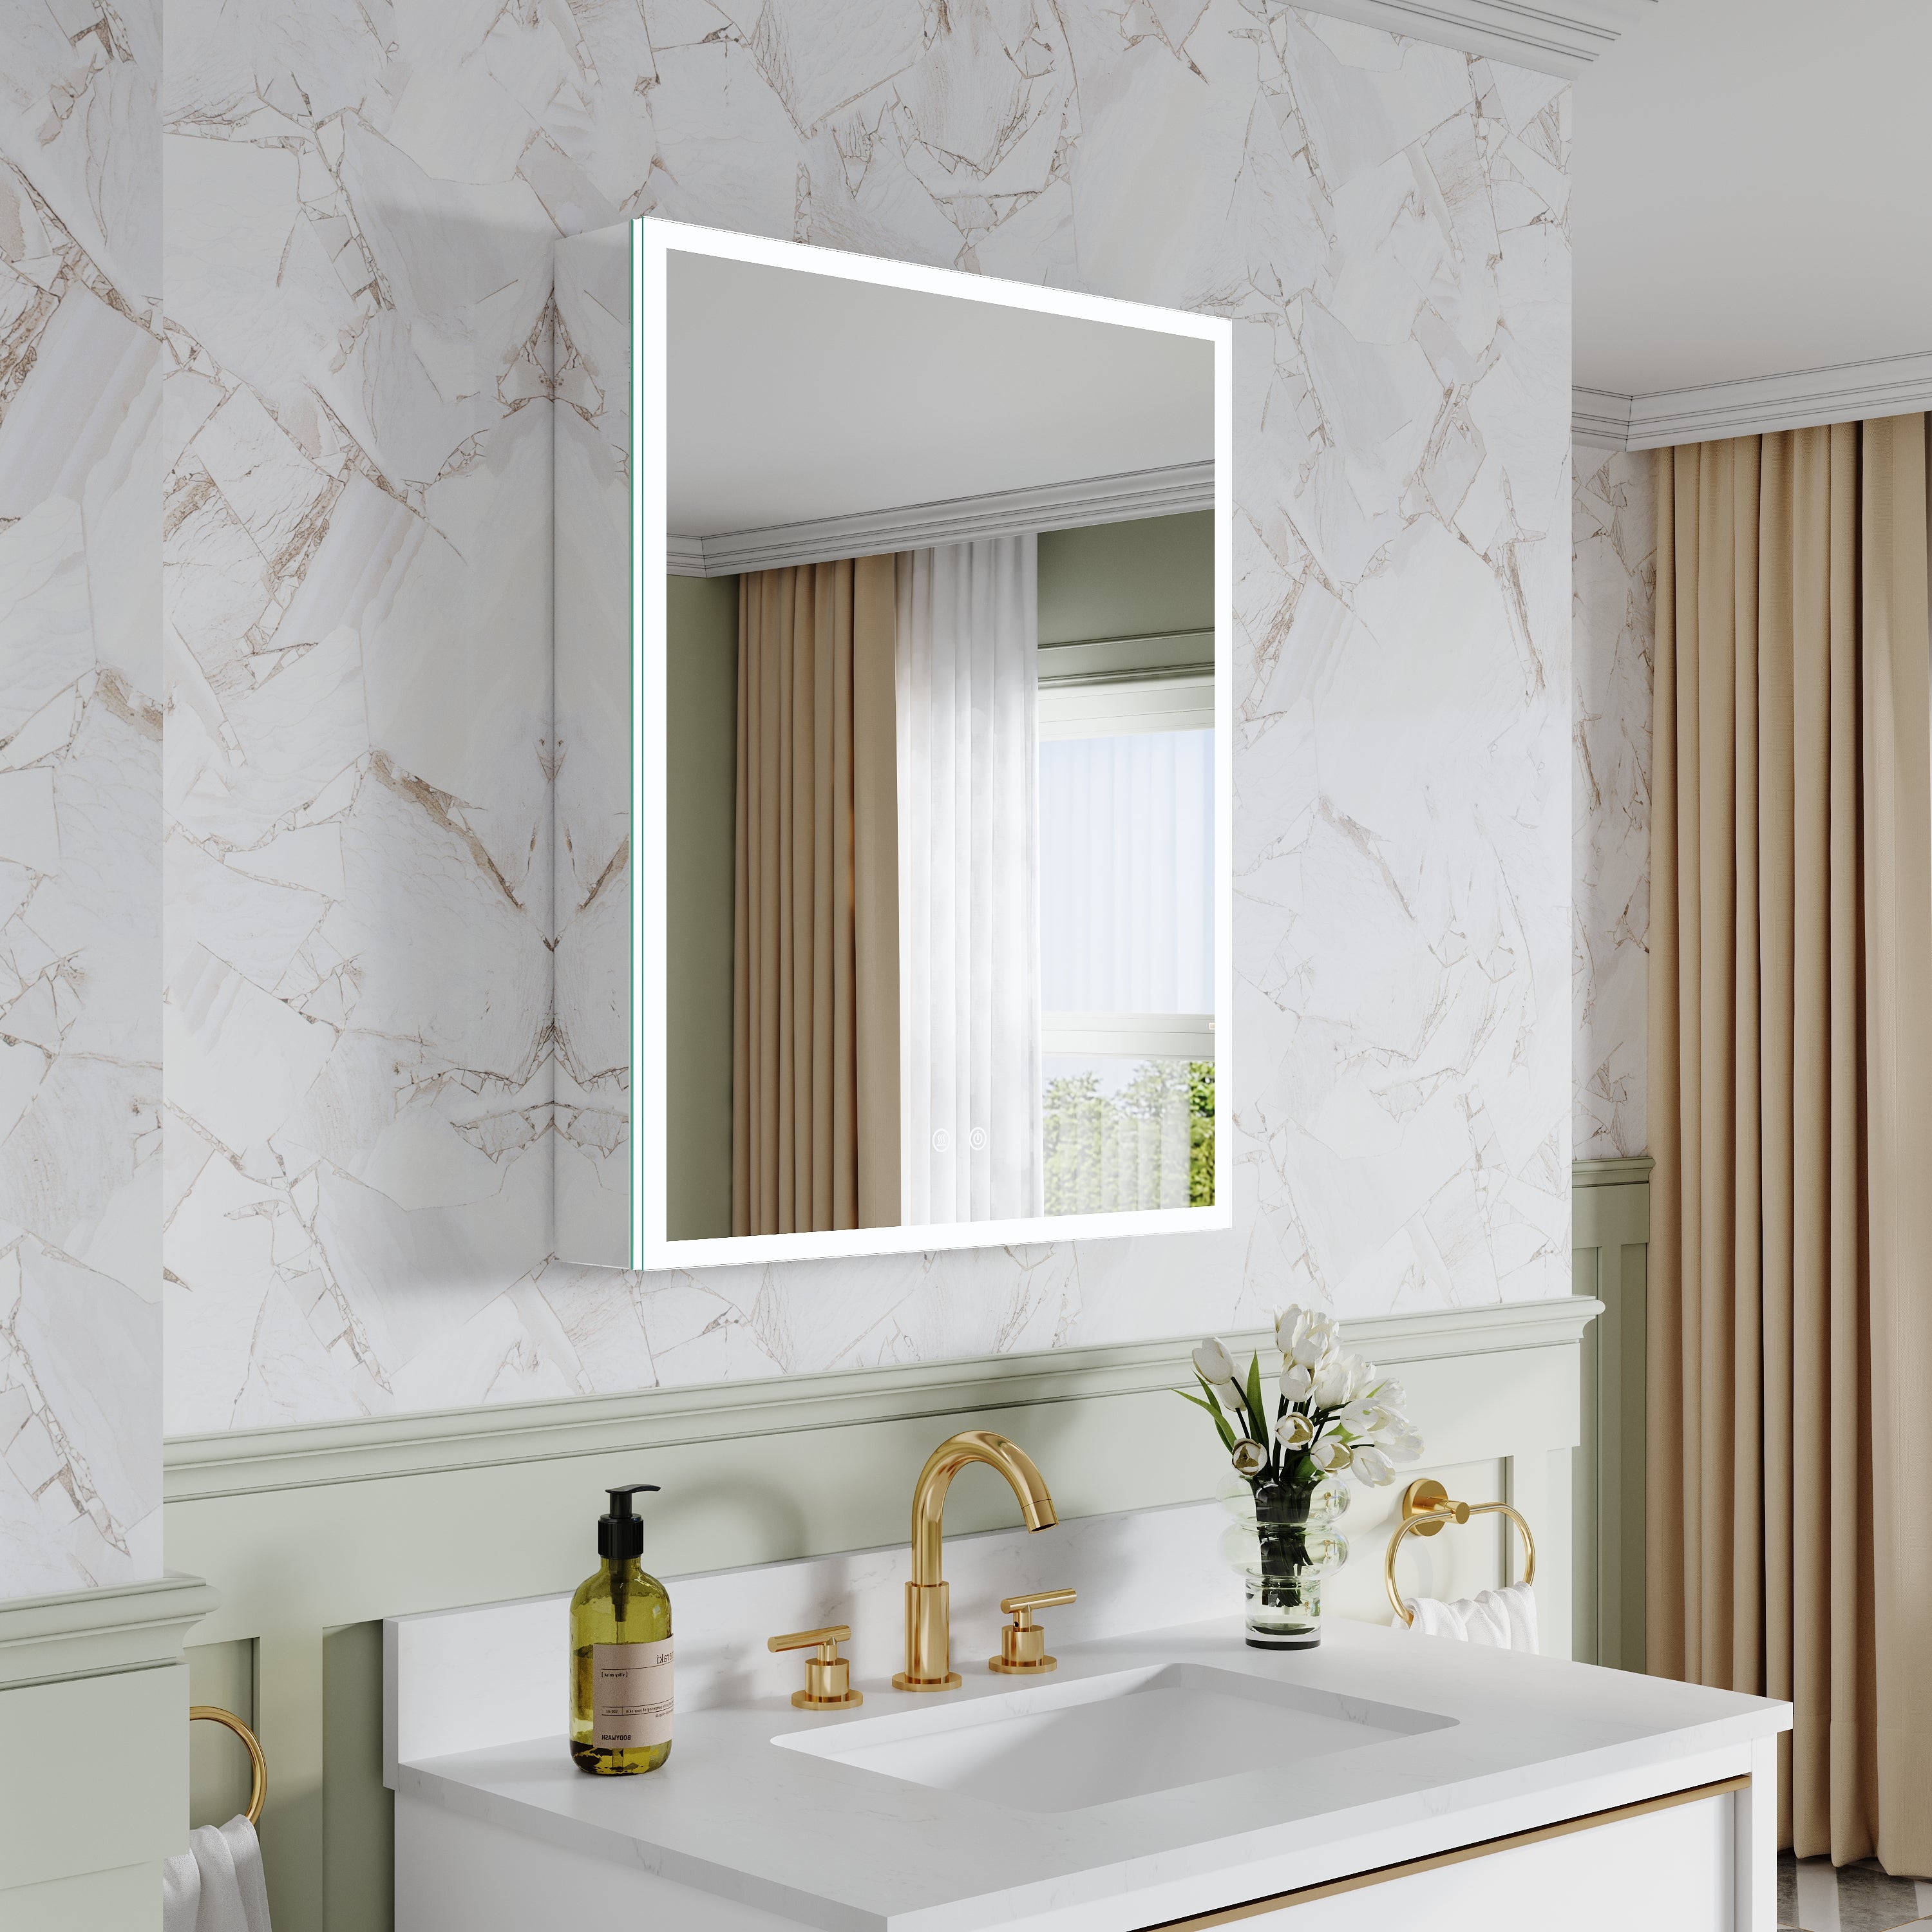
One of the simplest bathroom upgrades is a surface mount medicine cabinet with mirror. It puts things in storage, increases organization, and makes your space look cleaner and more polished without needing major remodeling.
A surface-mounted cabinet is attached to the wall, unlike a recessed cabinet, which must be mounted on the inside of the wall. It implies that most homeowners can install one in less than an hour with basic equipment.
This guide will take you through everything you need to know, including preparation and installation, so you can complete the project yourself.
What is So Good about a Surface-Mount Medicine Cabinet?
It is always good to know why the majority of homeowners choose surface-mounted cabinets before beginning the installation process.
1. Easier Installation
Recessed cabinets must cut through drywall and find studs, which can make installation difficult. Surface-mount cabinets can be easily attached to the wall, making them suitable for DIY projects.
2. More Storage Depth
Wall-mounted cabinets usually have a greater distance between them, allowing more space to accommodate toiletries, medications, and skincare products.
3. Flexible Placement
You are not required to cut into the wall, so you can put the cabinet practically anywhere above the sink, on a side wall, or even in a smaller bathroom with limited space.
4. Stylish Upgrade
Contemporary mirror cabinets represent storage and beauty. A smooth, mirrored door reflects the light and contributes to the illusion of the smaller bathrooms.
Materials and Supplies
The following tools and supplies are required before you can begin your installation:
· Drill or screwdriver
· Level
· Measuring tape
· Pencil for marking
· Wall anchors (when there are no studs)
· Mounting screws (mostly provided with the cabinet)
· Stud finder (not compulsory, but recommended)
Most surface-mount medicine cabinets include installation hardware and instructions, though having the right tools will make the task easier.

Step 1: Select the Appropriate Location
Begin by determining where the cabinet ought to be.
The majority of individuals affix the cabinet to the middle of the bathroom sink. Preferably, the cabinet bottom is approximately 4-6 inches above the faucet to enable easy access and mirror reflection.
Take a measuring rod and locate the midpoint of your sink, and mark it slightly with a pencil. This helps maintain the cabinet's suitability with the vanity.
Also, test the area around it so the cabinet door does not strike lights, walls, or other fixtures.
Step 2: Locate Wall Studs
To install the cabinet safely, it is best to anchor it in the wall studs where feasible.
Find the stud positions behind the wall using a stud finder. Indicate their places by means of a pencil.
If the studs and mounting holes of the cabinet do not match, the cabinet can still be installed with heavy-duty wall anchors that will support its weight.
Step 3: Indicate the Mounting Points
Leaning the cabinet against the wall at the required height. Check the level to ensure it is absolutely straight.
When the cabinet is in position, trace the holes on the wall with a pencil. These will be used to drill where.
This is a significant step: allowing yourself some time to check the alignment will prevent a cabinet from being unstrung in the future.
Step 4: Drill Pilot Holes
Remove the cabinet and drill pilot holes at the marked locations.
When drilling into studs, standard wood screws are suitable. Otherwise, before attaching the screws, put wall anchors into the holes.
Pilot holes simplify the process of securing the cabinet as well as minimizing the chances of breaking the wall.
Step 5: Mount the Cabinet
Since the holes are made, it is now time to put the cabinet back.
Install the mounting screws by passing the mounting screws through the back panel of the cabinet and screwing them to the wall studs or anchors.
Having a second person to hold the cabinet steady while you attach the screws is useful. After installation, check again with a level to ensure everything is straight.
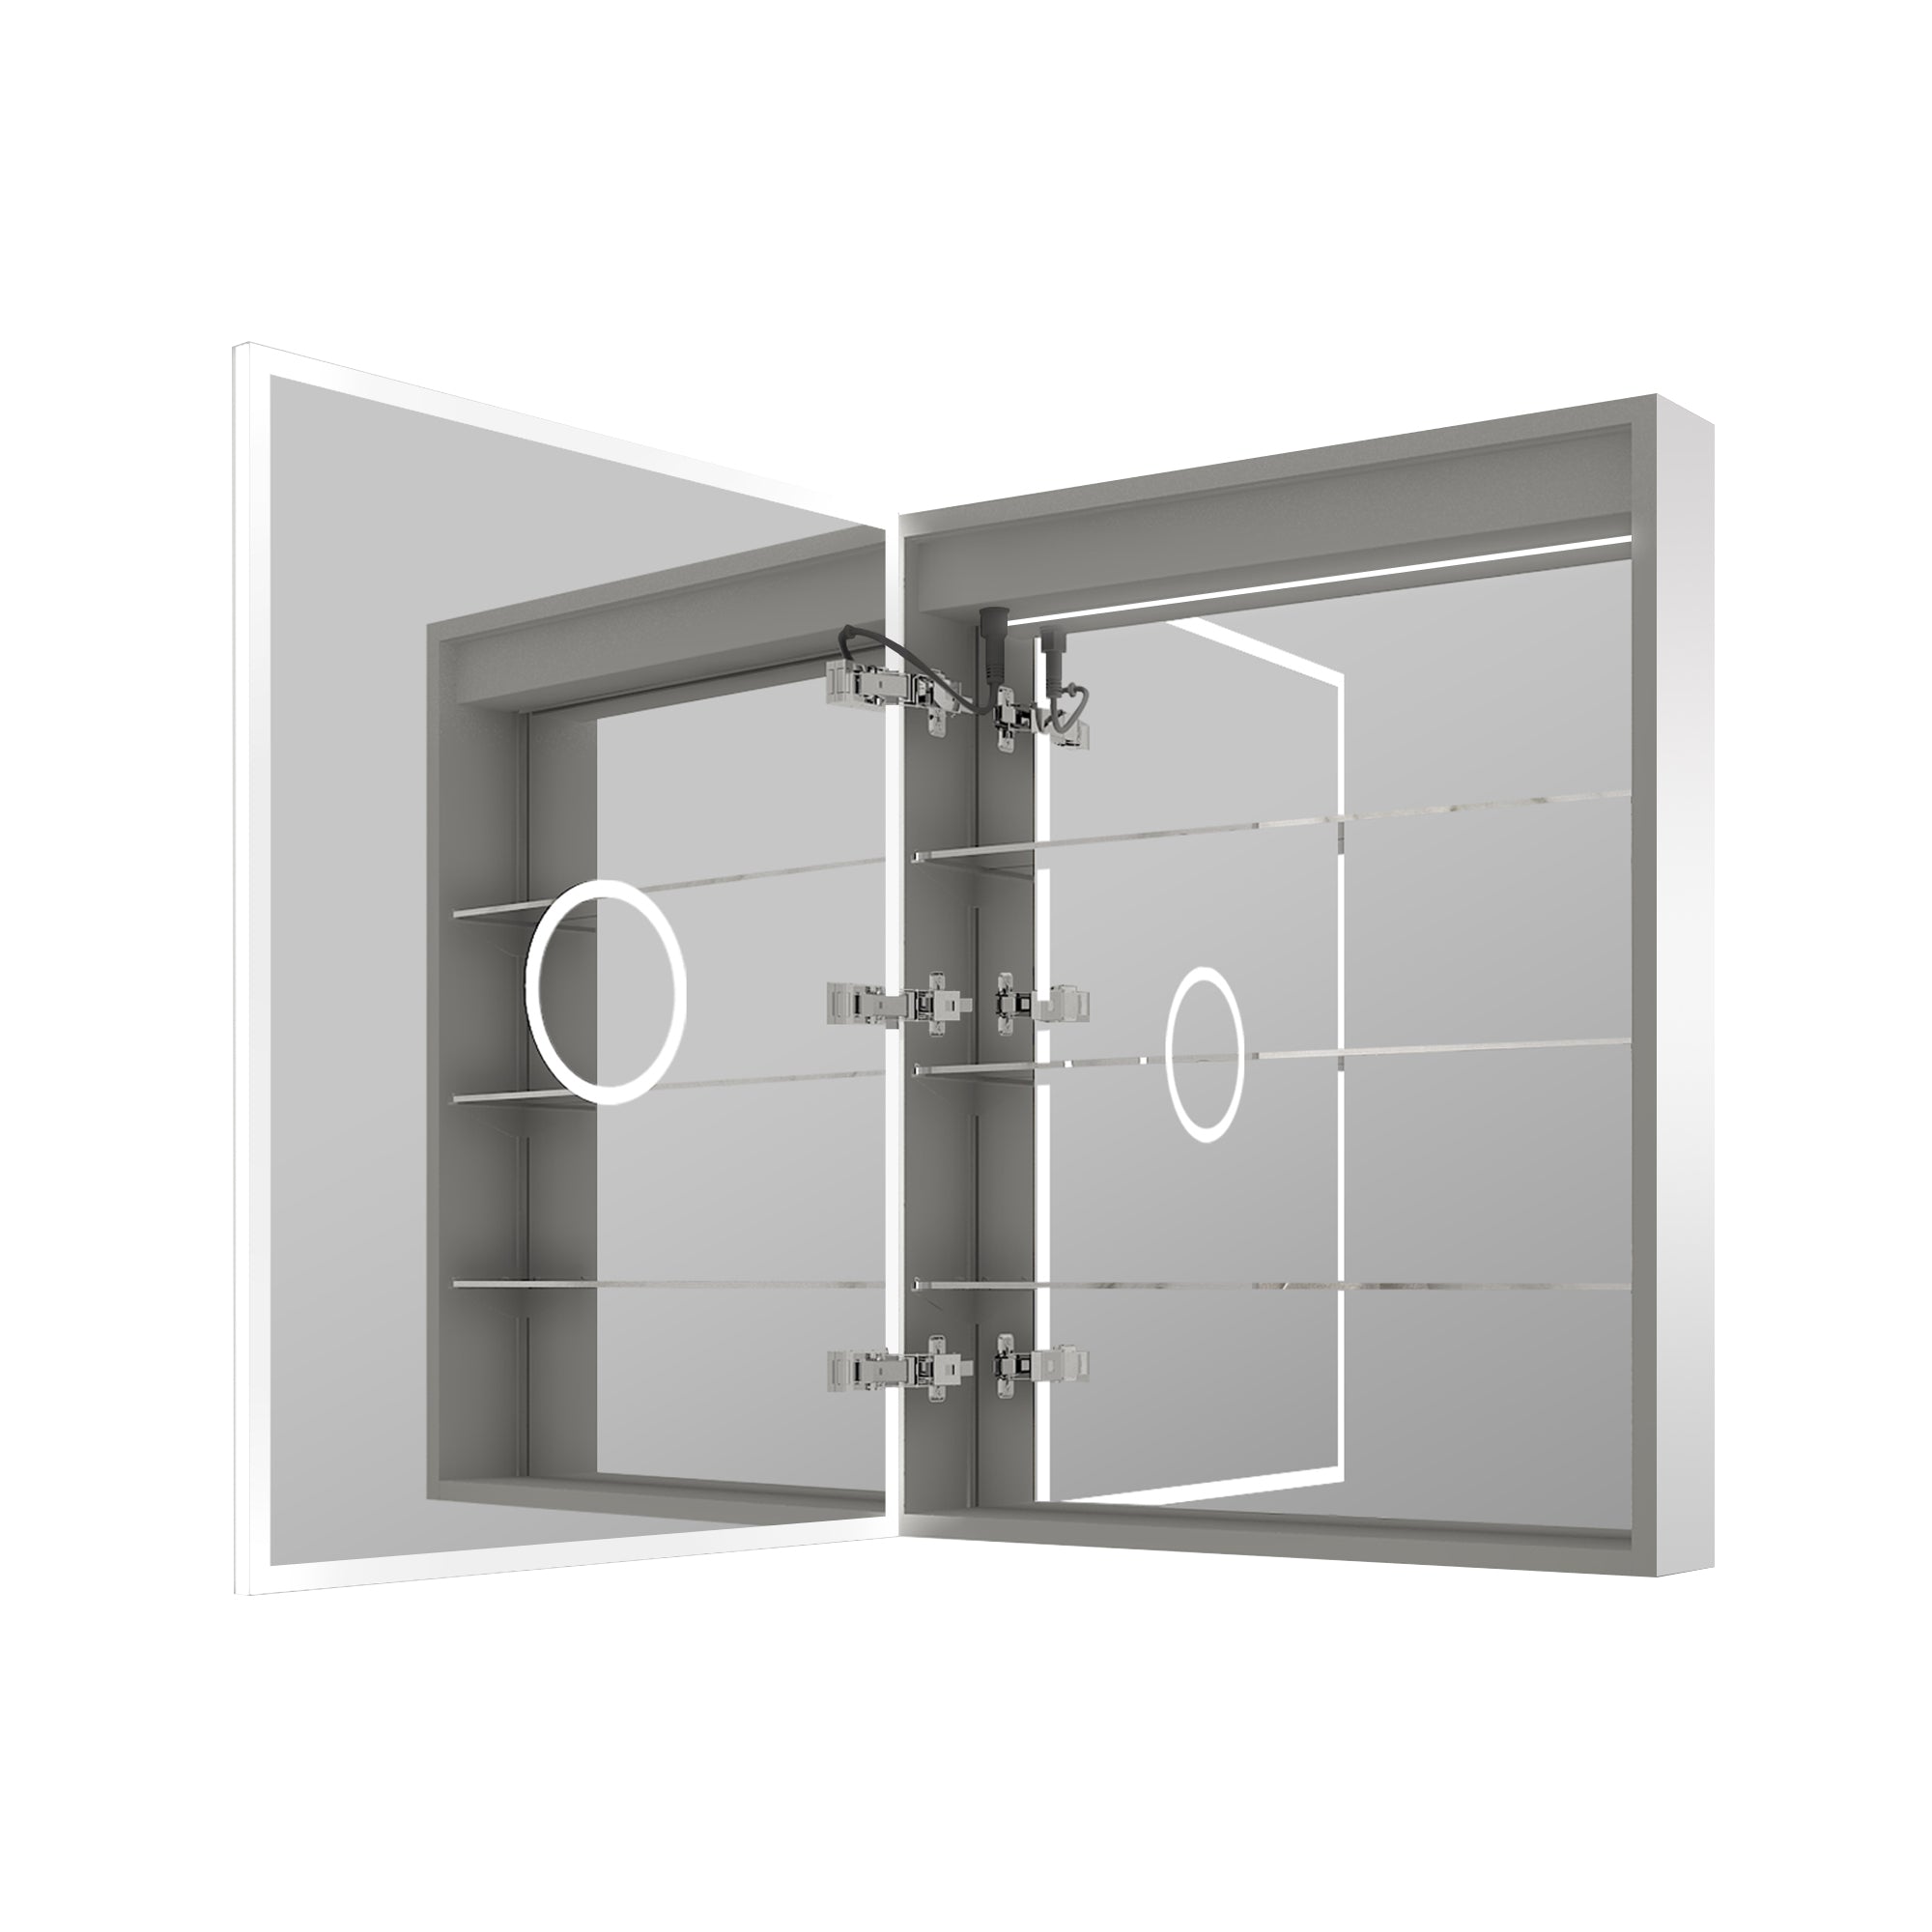
Step 6: Assemble the Shelves and Fit the Door
Once the cabinet is mounted, place any removable shelves that came along with the unit.
Most Most mirror cabinets today have adjustable hinges, allowing you to centralize the door alignment. Ase the door appears to be not symmetrical, then just tighten the screws in the hinge until it becomes perfectly flat.
Lastly, clean the mirror and put your bathroom basics there.
Clues to a Professional-Looking Installation
Although this project is easy to follow, there are additional tips that will help you achieve a professional output.
Measure Twice
Precise measurements are used to ensure the cabinet is centred and aligned correctly with the sink.
Use a Level
A cabinet that is slightly crooked is very noticeable on a bathroom mirror. Always make sure that you are in place before screwing.
Consider Lighting
If your bathroom lighting is above the mirror, ensure the cabinet height does not obstruct or block the light fitting.
Choose the Right Size
The width of the cabinets is generally 20 to 36 inches. Choose a size that matches your vanity and free wall space.
Stocking Your Medicine Cabinet
A medicine cabinet fitted on the surface does not need much maintenance once installed.
Here are a few quick care tips:
· Wipe the mirror with a no-abrasive glass cleaner.
· Do not overload shelves with heavy goods.
· Screw mounting looseness when necessary.
· Maintain the humidity under control by ventilating the bathrooms.
With proper care, your cabinet can remain useful for a long time, keeping your bathroom in order and avoiding clutter.
Final Thoughts
A medicine cabinet with a mirror in a surface-mount design is an easy DIY project that can significantly improve both storage and aesthetics in your bathroom.
Since the cabinet is mounted onto the wall, there is no need to cut into the drywall or to cut and install plumbing and electrical wires. Most homeowners can install their systems successfully with only a few tools and approximately 1 hour of work.
Such a tiny modification can cause a range of differences- add functionality and style to your bathroom by following a simple DIY upgrade.


Leave a comment
This site is protected by hCaptcha and the hCaptcha Privacy Policy and Terms of Service apply.