


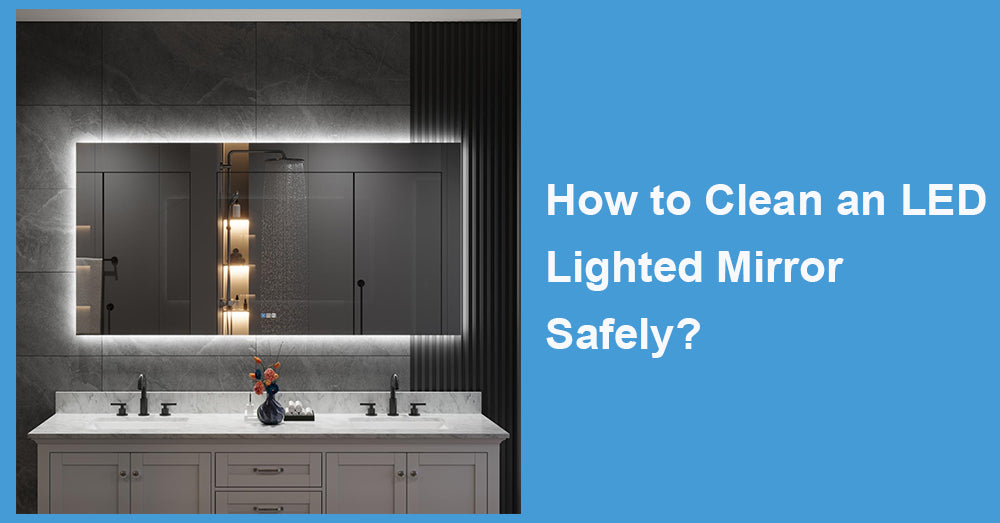
Many people only think about "leaving no watermarks" when cleaning led lighted mirror, but ignore the real risks: water vapor and cleaning agents infiltrating the edges/back electrical area of the mirror, as well as touch failure and short-circuit hazards caused by wiping while powered on.
The good news is that as long as the logic of "power off first, then partition, less liquid, edge control, and disinfection according to contact time" is followed, the lampshade can be clean and safe, and it is not easy to damage the coating, lampshade diffusion layer, and edge seal.
Below, we will explain "daily cleaning" and "scenarios that require disinfection" separately, and following them will not cause the car to overturn.
1. 30 seconds before cleaning: Do these 3 things first (determine the safety limit)
A. Turn off the power and wait for cooling
If the mirror is equipped with lights/anti-fog, turn off the mirror power first, and then wait a few minutes for the light surface and drive area to cool down. The hot state is more likely to cause the cleaning agent to evaporate and cause streaks to appear.
B. First, look at the edge structure of the mirror
The biggest fear of wearing a light mirror is not "dirty mirror surface", but the entry of liquid into the edge gap: once the edge seal is damaged, black edges, foggy edges, touch abnormalities, and local instability of the light strip may occur in the later stage.
C. Prepare two pieces of cloth
A 'wet wiping cloth' and a 'dry throwing cloth'. Using two pieces of cloth prevents you from repeatedly wiping dirty water with the same piece, which would only make it messier.
2. Daily cleaning (recommended 1-2 times a week): the most stable "less liquid" process
A. Step A: First, dry wipe and remove dust (don't skip it)
Gently wipe with a clean microfiber cloth to remove dust and lint. This way, the subsequent wet wiping will not use dust particles as "sandpaper" to grind back on the mirror surface.
B. Step B: Wet wipe only "slightly wet", do not "drip water"
Wet the cloth and twist it until it no longer drips. If you need cleaning power, add a little mild detergent to warm water (the less, the better) to make it "slightly slippery".
C. Step C: Press "S-shape/straight line" to wipe, do not draw circles
Wiping with an S-shape or straight line from top to bottom is easier to avoid spiral watermarks. When wiping the edge, the force is lighter, and the action is shorter, avoiding pushing the liquid into the seam.
D. Step D: Immediately dry-toss onto the waterless film
After wet wiping, do not wait for it to dry naturally. Use a dry polishing cloth to quickly polish from top to bottom. You will find that most of the "stripes" are actually "residual water film" dried on the mirror surface.
3. How to choose cleaning agents: divide "can be used" into 3 levels
Most secure mode (priority)
Warm water+minimal amount of neutral detergent
Or use only warm water (usually sufficient)
Caution mode (only when necessary and avoid approaching the edge)
Gentle, non-abrasive glass cleaner
Key point: Spray on the cloth; do not directly spray on the mirror. Especially, do not let the cleaning agent flow down along the mirror to the edges and back.
❌ Avoid blocking (the easiest way to damage the mirror/diffusion layer/seal)
Grinding type cleaning paste, scouring pad, rough tissue
Strong acid and alkali, ammonia, or strong solvent-based cleaning agents (may damage the coating, diffusion layer, and edge sealing)
Steam cleaning machine/high-temperature spray (simultaneously applying heat and moisture, making it easier for water vapor to penetrate into the electrical area)
You may see in some cleaning suggestions that 'spraying the mirror directly is cleaner,' but for illuminated mirrors, 'cleaning power' is not as important as 'controlling the risk of edge leakage.' Once the mirror enters the liquid from the edge, the subsequent problems are often irreversible.
4. How to deal with key risk areas such as edges, touch areas, and light-emitting diffusion layers?
A. Edge: Use only a "drier cloth" to gently rub and try not to linger back and forth on the edge.
B. Touch area: Do not repeatedly wipe with cleaning agents containing oil or strong solvents, as it may cause sluggish or accidental touch.
C. Luminous diffusion layer (the white circle on the mirror surface): It is usually more scratch-resistant than glass. First, dry-wipe and remove dust; then gently wipe with a slightly damp cloth; finally, dry it.
5. If you need to "disinfect" (such as someone getting sick at home): Don't skip the step of "cleaning → contact time."
Disinfection is not just about spraying disinfectant on it. The recommendations of authoritative health institutions are to clean first, then disinfect, and to keep the disinfectant in contact with the surface for sufficient "wet contact time"; otherwise, the effect will be greatly reduced.
Safer approach (for mirror and countertop perimeter)
First, use warm water/neutral cleaner to wipe off the mirror stains.
Then use a compliant disinfectant to "wet wipe" (still following: try not to let the liquid flow to the edges and back)
Keep moist for a certain period of time according to the product label requirements; If you are using diluted bleach and lack more specific instructions, it is generally recommended to maintain at least 1 minute of contact time before wiping/drying.
Finally, use a slightly damp cloth with clean water to wipe again (especially if you are concerned about residual irritation), and then dry off.
Important reminder: Disinfection with illuminated mirrors should focus more on the "mirror glass area", and should not be treated as "rinsing", let alone pouring liquids into the edges, gaps, or back.
6. Give you a 'no problem' operating scale with inches
• The cloth should be slightly damp, not dripping; wring it out before wiping.
• When wiping the edge, control the action to within 1-2 inches of the edge, and do not push the liquid into the seam.
• If spray is necessary, wipe the cloth surface within 6"-8" from the mirror after spraying it on the cloth (avoid spray spreading to the edge and back)
7. The 6 most common cleaning mistakes (you win half by avoiding them)
• Wipe the mirror while powered on (especially in the touch area)
• Spray the cleaning agent directly onto the mirror and let it run down the edge.
• Rub the diffusion layer vigorously with tissue paper/newspaper/coarse cloth.
• Use strong solvents or abrasive products to 'polish.'
• Use a steam cleaner to spray on the face.
• Do not dry throw, let the water film dry naturally → stripes and watermarks repeatedly appear.

8. Conclusion: The core of safety and cleanliness is in one sentence
Power off cooling+Two cloth method (slightly wet wipe, immediately dry throw)+Control edge leakage+Follow contact time when disinfection is needed.
If you follow this routine, the mirror will be brighter, the light strip will be more stable, and the probability of black/foggy/touch abnormalities will be significantly lower.


Leave a comment
This site is protected by hCaptcha and the hCaptcha Privacy Policy and Terms of Service apply.