


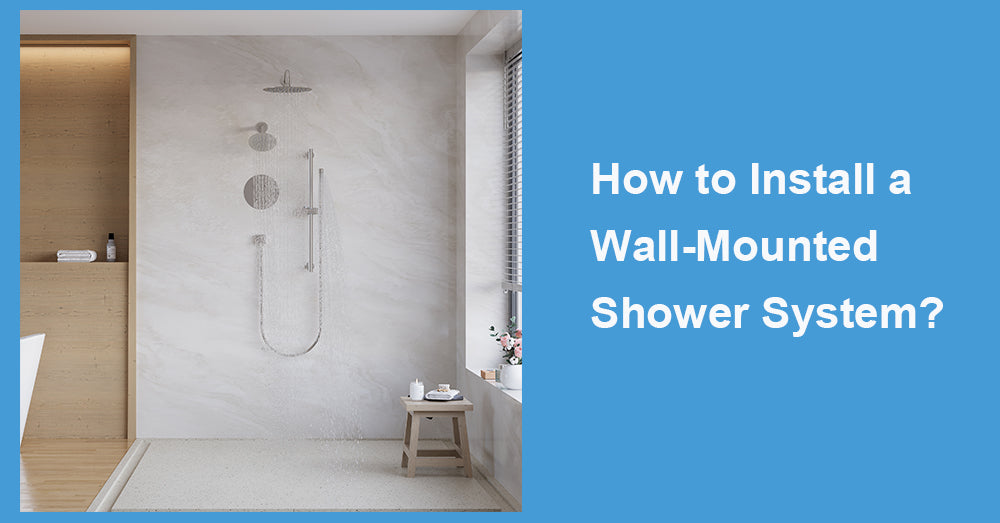
A wall-mounted shower system can make your bathroom feel like a sleek, spa-like retreat. Whether replacing to improve function or design look, you can’t deny the value and convenience of a wall-mounted shower system. Although the installation process may appear daunting at first it is something that you can do with a little bit of help, a few tools and proper preparation.
In this guide I will walk you through how to install a wall shower system from start to finish. So at the end you will have a functional and a bathroom with style to implement to your everyday life.
What Is a Wall-Mounted Shower System?
A wall-mounted shower system is a setup that includes key elements like a showerhead, a handheld spray, and sometimes body jets, all mounted to your bathroom wall. These systems are designed for versatility, allowing you to switch between different spray options and adjust water temperature with ease.
Key features of wall-mounted shower systems include:
· Enhanced aesthetics with modern, clean designs.
· Improved functionality with multiple spray settings.
· Ease of use, perfect for households with varying needs.
Popular brands like Wellfor offer a range of options, from sleek minimalist designs to systems loaded with advanced features, ensuring you’ll find something to fit your taste and budget.
Now that you know what a wall-mounted shower system is, let’s get started on how to install one.
Tools and Materials You’ll Need
Before jumping into installation, make sure you have all the necessary tools and components. Here’s a handy checklist:
Tools:
· Adjustable wrench
· Drill with masonry/tile bits
· Screwdriver
· Tape measure
· Level
· Pipe wrench
· Teflon tape
· Plumber’s putty
· Safety goggles
· Marker or pencil
Materials:
· Wall-mounted shower system kit (consider Wellfor, which offers high-quality, reliable systems)
· Wall anchors (if required)
· Pipe sealant or plumber’s tape
· Silicone caulk
Having everything ready beforehand ensures a smoother installation process.
Step-by-Step Guide to Installing a Wall-Mounted Shower System
Step 1: Prepare Your Space
Start by preparing your work area to avoid unnecessary mess or mistakes:
· Turn off the water supply. Locate the water shut-off valve and close it to prevent leaks.
· Inspect your pipes. If you’re replacing an old shower system, check the existing plumbing to ensure it’s in good condition. Replace any damaged pipes to avoid issues down the road.
· Mark your layout. Use a marker or pencil to outline where the shower system components (e.g., showerhead and handheld unit) will be installed. Refer to the manufacturer’s instructions for ideal measurements.
Make sure the wall where you’re installing the system is clean and free of debris.
Step 2: Remove the Old Shower System (If Applicable)
If you’re replacing an existing system, carefully remove it:
1. Unscrew the old showerhead and other attachments. Use an adjustable wrench if they’re tightly secured.
2. Remove any mounting brackets or fixtures from the wall.
3. Clean the area thoroughly, scraping off old caulking or residue to create a smooth surface.
This step ensures a clean slate for your new wall-mounted shower system.

Step 3: Install the Shower Arm and Showerhead
1. Attach the shower arm. Wrap Teflon tape around the threaded end of the shower arm. This tape helps create a watertight seal and prevents leaks. Screw the arm into the pipe opening in the wall, tightening it with a wrench.
2. Attach the showerhead. Wrap Teflon tape around the threads of the showerhead and twist it onto the shower arm. Tighten carefully to avoid overtightening, which could damage the threads.
Step 4: Install the Handheld Spray Unit
For shower systems with a handheld spray attachment, follow these steps:
1. Mount the holder. Drill holes into the wall at the desired height for the handheld spray holder. Insert wall anchors if required, then screw the holder securely in place.
2. Connect the hose. Attach one end of the flexible hose to the shower system and the other end to the handheld spray. Use Teflon tape for secure, leak-free connections.
3. Secure the handheld spray. Place the handheld spray into the mounted holder for easy access.
Step 5: Connect and Secure Additional Components
If your shower system includes extra features, like body sprays or a diverter valve:
1. Install the diverter. Follow the manufacturer’s instructions to connect the diverter valve, which allows you to switch between the showerhead and handheld spray (or other outlets).
2. Install body sprays (if applicable). Drill into the designated wall areas and mount the body sprays securely, ensuring all connections are sealed with Teflon tape.
Step 6: Seal and Test the System
Once all components are installed, it’s time to test and seal everything:
1. Apply silicone caulk. Run a bead of silicone caulk along any seams or gaps where water could seep through, particularly around the shower arm and mounting brackets.
2. Turn on the water supply. Slowly open the water shut-off valve.
3. Check for leaks. Inspect all connections for any signs of dripping or leaking. Tighten fittings as needed.
4. Test the system. Run water through each component (showerhead, handheld spray, etc.) to ensure proper functionality.
Step 7 (Optional): Add Finishing Touches
If your new wall-mounted shower system includes aesthetic features, such as decorative trim or covers, install them as the final step. This adds a polished, professional look to your installation.
Pro Tips for a Smooth Installation
· Check compatibility: Ensure your wall-mounted shower system is compatible with your bathroom’s existing plumbing before purchasing.
· Seek help for advanced plumbing: If modifications to your plumbing system are needed, consider hiring a professional plumber.
· Use a level: Always double-check with a level to ensure components are installed straight and evenly.
With these tips in mind, your installation will go more smoothly, saving you time and potential headaches.
Why Choose a Wall-Mounted Shower System?
If you’re still on the fence about a new wall-mounted system, here are a few reasons to make the upgrade:
· Efficiency: Wall-mounted systems optimize water flow and distribution.
· Customization: Easily adjust spray patterns for a tailored shower experience.
· Aesthetics: Sleek designs elevate the look of your bathroom.
· Durability: Quality systems from brands like Wellfor are built to last, offering excellent performance and longevity.
When you choose a brand like Wellfor, you can feel confident in your purchase, knowing you’re investing in both style and quality.
Final Thoughts
Installing a wall-mounted shower system might seem daunting, but it’s entirely manageable with the right preparation and tools. Follow the steps outlined above, and you’ll quickly transform your shower space into a functional and stylish haven.
Whether you’re doing a complete bathroom renovation or simply upgrading your shower, a wall-mounted system delivers unparalleled convenience, elegance, and performance. Take your time, double-check your measurements, and enjoy your new spa-like retreat.
Happy installing!


Leave a comment
This site is protected by hCaptcha and the hCaptcha Privacy Policy and Terms of Service apply.