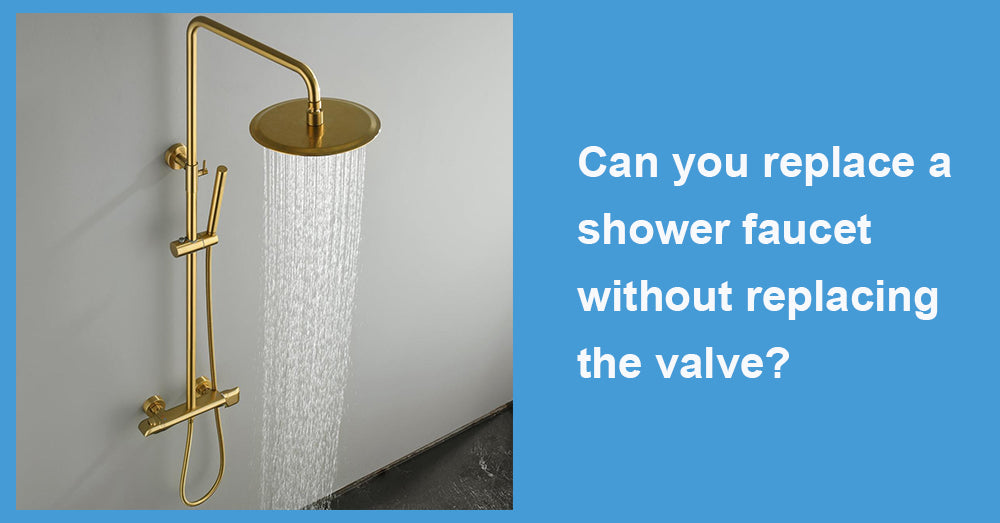
A shower faucet is more than just a functional component of your bathroom.
It's a critical element influencing your shower's aesthetics and overall experience.
But what happens when it starts to show signs of wear and tear?
You might be considering replacing your shower faucet. But does that mean you also need to replace the valve?
This article will explore whether replacing a shower faucet without replacing the valve is possible.
We'll also guide you through the process and discuss the parts and considerations involved in such a task.
Understanding Shower Faucets and Valves
A shower faucet is the component that controls the flow and temperature of the water in your shower.
It's connected to a valve, which is the mechanism that mixes hot and cold water to achieve the desired temperature.
There are several shower faucets and valves, each with its features and installation requirements.
Here are some common types:
-
Single-handle faucets
-
Dual-handle faucets
-
Thermostatic valves
-
Pressure balance valves
Identifying Your Shower Valve Type
Before you start with the replacement, it's crucial to identify your shower valve type.
This is because the type of valve can affect the compatibility with the new faucet.
This information is usually found in the product manual or the manufacturer's website.
If you need clarification, consult a professional plumber to avoid potential issues.
Signs You Need a Shower Faucet Replacement
If your shower faucet leaks, it might be time for a replacement.
A constant drip can lead to higher water bills and potential water damage.
Another sign is difficulty in adjusting the water temperature. This could indicate a problem with the valve.
Lastly, if your faucet is outdated or doesn't match your bathroom's style, consider a replacement for aesthetic reasons.
Tools and Materials for Shower Faucet Replacement
Before you start, gather all the necessary tools and materials.
You'll need a screwdriver, adjustable wrench, and pliers.
For materials, you'll need a new shower faucet and possibly an adapter kit.
Also, consider having plumber's tape and caulk on hand.
Here's a quick list for reference:
-
Screwdriver
-
Adjustable wrench
-
Pliers
-
New shower faucet
-
Adapter kit (if necessary)
-
Plumber's tape
-
Caulk
Safety Precautions Before Starting
Before you begin, remember to turn off the water supply.
This will prevent any unwanted water flow during the process.
Also, ensure you're working in a well-lit area.
Lastly, if you need clarification on any step, consult a professional.
Step-by-Step Guide: Replacing the Shower Faucet

Replacing a shower faucet can be a straightforward task.
First, gather all the necessary tools and materials.
These may include a wrench, screwdriver, plumber's tape, and the new shower faucet.
Next, prepare your work area.
Ensure it's clean and free of any items that could get in the way.
Removing the Old Shower Faucet
Start by removing the old shower faucet wall mount.
Use your wrench to loosen and remove the screws holding it in place.
Be careful not to damage the surrounding tiles or walls.
Once the faucet is loose, gently pull it out from the wall.
Remember to keep all removed parts in a safe place.
Installing the New Shower Faucet
Now, it's time to install the new shower faucet.
First, apply the plumber's tape to the threads of the new faucet.
This helps to create a watertight seal.
Next, align the new faucet with the existing valve.
Ensure it fits correctly before tightening it with your wrench.
Finally, check for any leaks by turning on the water supply.
If there are no leaks, your new shower faucet is successfully installed!
Ensuring Compatibility and Handling Complications
When replacing a shower faucet, compatibility is critical.
The new faucet must fit the existing valve.
If it doesn't, you may face complications.
These could include leaks or poor water flow.
When to Use an Adapter Kit
Sometimes, the new faucet doesn't fit the existing valve.
In such cases, an adapter kit can be a lifesaver.
It lets you connect the new faucet to the valve, ensuring a proper fit.
Checking for Leaks and Final Touches
After installing the new faucet, it's time to check for leaks.
Turn on the water and observe the faucet.
You may need to tighten the connections if you see any water dripping.
You can add the final touches once you're sure there are no leaks.
This could include sealing the area around the faucet or installing a trim plate.
Maintenance Tips for Your New Shower Faucet
Regular maintenance is vital to prolonging the life of your new shower faucet.
This can include cleaning the faucet regularly to prevent buildup of mineral deposits.
Also, fix any leaks promptly to prevent damage to the faucet or your bathroom.
When to Consider a Full Valve Replacement
While replacing just the faucet can solve many issues, a complete valve replacement is sometimes needed.
This is often the case if the valve is old, damaged, or unsuitable for the new faucet.
Always consult a professional if you need clarification on whether a complete valve replacement is necessary.
Takeaway: The Benefits of a Proper Shower Faucet Replacement
A proper shower faucet replacement can significantly improve your shower experience. It can provide better water flow and temperature control and even add aesthetic appeal to your bathroom.
Moreover, it can increase the value of your home, making it a worthwhile investment.



















Leave a comment
This site is protected by hCaptcha and the hCaptcha Privacy Policy and Terms of Service apply.