


Are you looking forward to a luxurious bath but feel the standard faucet needs to be completed? Customize your bathing experience by purchasing an independent bathtub faucet that will allow you to adjust how water flows and temperature. Before you hastily purchase one, however, there is some information that you need to have to ensure it is put in properly and safely. Installing a tub faucet yourself can seem like a simple DIY project; nonetheless, it involves turning off the water supply and handling plumbing connections. If done wrongly, though, leaking may arise, as well as the crossing of water lines or even floods. So relax and go through this guide by Wellfor before taking any action. At the end of this piece, you will know how to add that indulgent independent faucet to your tub without any risk.
Understanding Independent Tub Faucets
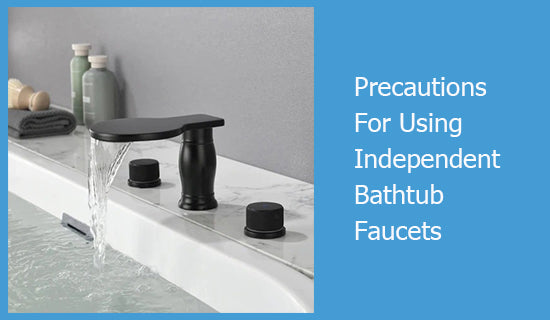
Stand-alone bathroom tub faucets are perfect for those who wish to get freestanding tubs in their bathrooms, though they need little caution upon installation.
Before heading out to buy a freestanding tub faucet, check its measurements first so that it fits well into your tub. There is considerable variation in the weight of independent taps' tub rims; hence, select one designed for your specific sort of tub.
Afterward, shut off the water and open the spout, allowing any built-up pressure to escape. Then disconnect the existing pipe and drain it thoroughly. Sanitize the area comprehensively while removing all debris.
Now, another tube should be put in place. Securely attach them manually to prevent lines from creeping in by hand when attaching supply lines to the tap's underside as well as screwing them on. Depending on the holes used with installation, mark the edges of your bathtub using a pencil where the pipe lays across it, then remove it by drilling a pilot hole(s).
Put back part of pipe inside firmly, ensuring mounting nuts are firmly fixed by hands only. Turn the water back on to ascertain leaks, then tighten it if necessary. Finally, turn on the new faucet and wash away any dirt before you use the tub.

Key Precautions When Installing a Bathroom Tub Faucet
Installing a stand-alone bathroom tub faucet may seem simple, but there are a few caveats to keep in mind.
First, turn off the water before you start any work. Install tub drains with shut-off valves under or near the sink. Safer is better than soaking!
Next, determine if the new pipe will fit your existing tub. Measure the tub's edge to ensure the faucet and handle are not hanging up and the spout extends to the tub's edge. You'll also want to confirm that the faucet connections match your plumbing. If not, you may need adapters to connect hot and cold water lines.
· Connecting the Faucet
When installing a new pipe, apply a plumber potty, silicone caulk, or mounting gasket in place before welding the pipe to form a watertight seal. Tighten the mounting nuts by hand, then use a basin wrench to tie it tightly. Connect supply lines to appropriate hot and cold valves.
Slowly turn the water back on and check for drips or leaks before using the tub. If all looks good, you have installed your freestanding tub faucet and are ready to enjoy a relaxing bath! With some precautions, you can rest peacefully, knowing your new bathroom tub faucet is secure and working correctly.
Maintaining Your New Tub Faucet for Safety and Longevity
Follow these maintenance tips to keep your new tub faucet running safely and efficiently for years to come:
· Regular Inspections
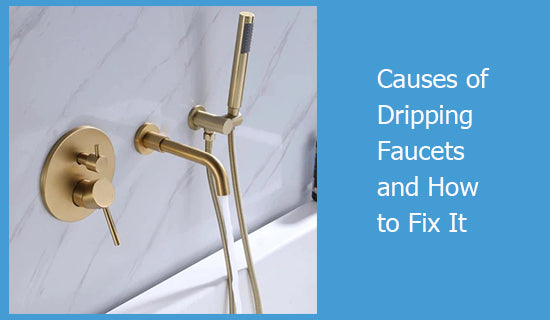
Regularly inspect your bathroom tub faucets, supply lines, and drain components. Check for leaks, drips, or any signs of damage at least once a month. Tighten any loose connections and replace worn and damaged parts immediately if they leak or cause other problems.
· Clean the Faucet and Shower Head
Mineral buildup can clog your faucet and shower head over time, reducing water flow. Unscrew the shower head and faucet aerators at least once every 3-6 months to remove debris. Soak all parts in a vinegar and water solution to dissolve hard water deposits and grime before scrubbing clean and reassembling.
· Lubricate the Cartridge or Stem
The cartridge or stem inside your tub faucet controls the flow of hot and cold water. After a year or so, it may start to stick or squeak. Shut off the water supply and disassemble your faucet to access the cartridge or stem. Apply the plumber's grease or petroleum jelly and reassemble, turning the water back on to test. Lubrication helps all parts move freely.
· Consider Low-Flow Options
Replacing old shower heads and faucet aerators with high-flow ones can improve efficiency and reduce utility bills. Low flow, especially WaterSense certified, can cut your water usage by up to 60% while still providing satisfying water.
Following these best practices for caring for your new tub faucet and associated plumbing parts will help ensure you have the safe, trouble-free enjoyment of your bathtub for years to come. Be proactive and address any issues quickly to avoid costly emergency repairs. Your tub and wallet will thank you!

Conclusion
So there you have it, the basics you need to know before installing a bathroom tub faucet. Sure, it may seem like a simple DIY project, but there are safety risks if you don't proceed cautiously. Take the time to turn off the water, check your plumbing system, and have the right tools on hand. Once correctly installed according to the instructions, you will enjoy your beautiful water transfer to your new standing tub in no time. Remember to measure twice and cut once. And if you ever feel stuck, feel free to call a plumbing professional. It's possible to head into the spa-like bathroom with Wellfor.


Leave a comment
All comments are moderated before being published.
This site is protected by hCaptcha and the hCaptcha Privacy Policy and Terms of Service apply.